
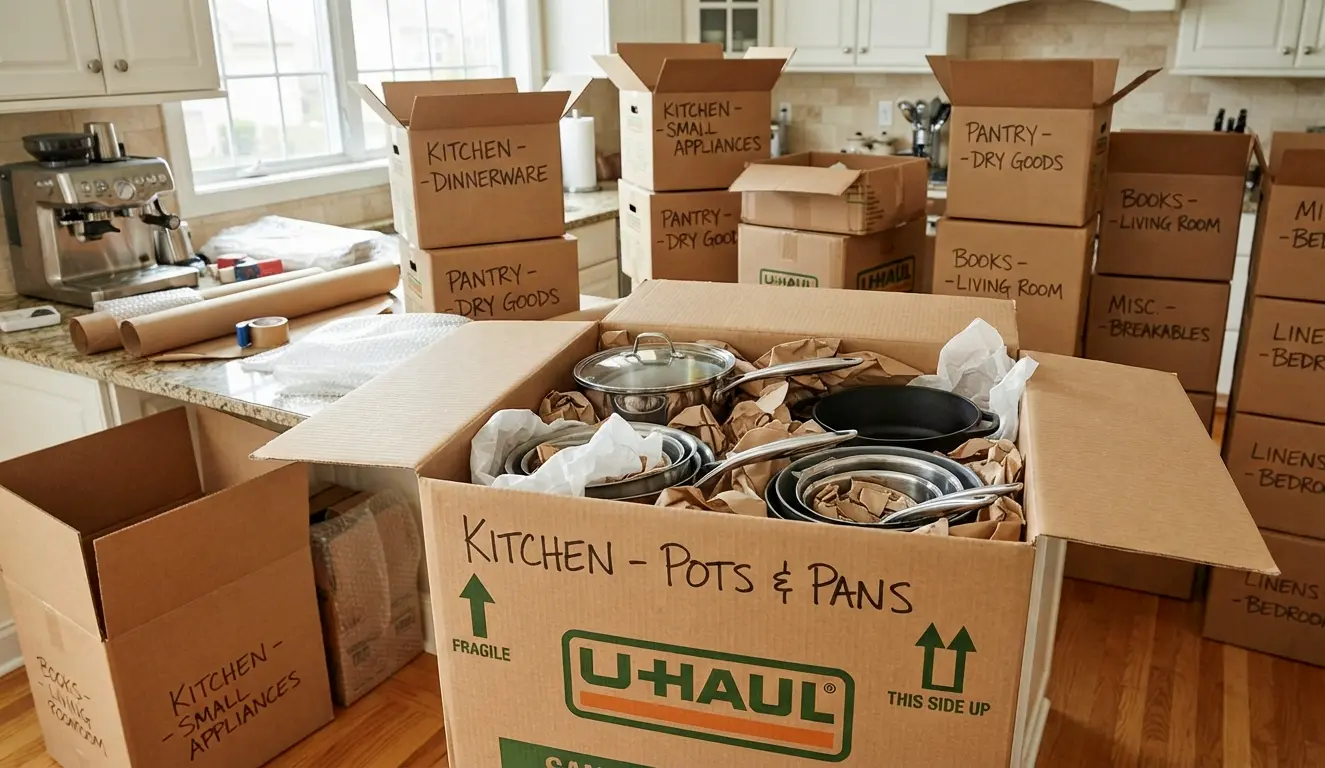
How to Pack Pots and Pans for Moving in 7 Simple Steps
I personally saw a family move into a new home and discovered their non-stick pans nested one on top of the other with no cushioning between them. Each pan was scratched with thin lines from the pan nesting above it, and the several hundred-dollar set already showed signs of wear before they prepared a single meal in their new home.
The simple answer to the question about how to pack pots and pans during a move is this: separate cookware by type of material, use packing paper or a towel between every piece you nest, wrap lids separately and pack all items snugly in a box corresponding in size to the weight of the cookware. Cookware is heavy and fragile enough to scratch or dent each other while stacked, so the cushioning between the pieces becomes as important as the box itself.
If you’re planning to pack your own kitchen on your own, packing cookware properly takes just a bit more time per each piece. Here is exactly what needs to be done.
Table Of Contents[hide]
Packing Supplies You'll Need
All the items below can be found cheap and easily in a hardware, grocery, or office supply store.
- Small moving boxes
- Medium moving boxes
- Heavy-duty moving boxes
- Packing paper
- Bubble wrap
- Packing tape
- Dish towels
- Kitchen towels
- Foam sheets
- Cardboard dividers, optional
- Permanent marker
- Labels
- Plastic bags for loose hardware
- Stretch wrap, optional
In my opinion, heavy-duty boxes are a worthwhile investment when moving cookware because cast iron and stock pots are quite heavy, and there comes a point where a standard box begins to sag while you’re still packing the items.
Things to Do Before Packing Pots and Pans
A few preparations before you begin to wrap will save time and protect your cookware from damage during the move.
- Clean cookware thoroughly. Any grease or moisture left on the items may rub off onto the packing paper or other items inside the box and stain or impart an odor after being sealed in a box for several days.
- Eliminate any grease and food residues. This will prevent you from having to clean your items more extensively after unpacking them.
- Categorize the cookware according to material. Divide the non-stick, stainless steel, cast iron, and copper cookware into separate groups, as each type needs to be handled differently and shouldn't be wrapped along with another metal.
- Organise lids. Put lids aside from their cookware so that they can be packed with adequate padding instead of rattling against the cookware during transportation.
- Check for any loose handles. Make sure there aren't any loose or wobbly screws or handles that need tightening before packing them into the moving boxes. Tighten them using just a basic screwdriver to prevent breakage while moving.
- Separate the valuables. All the cookware that has been bought with the intention of being valuable and expensive should be set apart and packed separately from regular cookware.
- Donate your unused cookware. Moving is a great opportunity to get rid of the cookware that you haven't used in a long time to reduce packing and lifting.
Step-by-Step Guide to Packing Pots and Pans
- Step 1: Sort Cookware by Material and Size
First lay out all your cookware by type and sort them by their size after that. Why does sorting matter? Nesting cookware of different materials, such as putting a stainless steel pot inside a non-stick pan, is the fastest way to scratch a coating of the latter.
A usual error that homeowners make is to take cookware right out of the cupboard and pack them without sorting in advance. It takes just five more minutes to do it.
- Step 2: Wrap Individual Pieces
Make sure that all pots and pans are wrapped in packing paper, bubble wrap, or folded towels before nesting them along with other items. Special attention should be paid to the non-stick or coated surfaces as they are more susceptible to scratches than stainless steel and cast iron surfaces.
Wrapping process is the step that will prevent all the scratching and denting after relocation. Not performing it to save time is the biggest mistake people make, resulting in most damage.
- Step 3: Nest Cookware With Padding Between Pieces
All similar items should be nested inside the box, and between each item you need to place packing paper or a towel for protection and saving some room in the box as well. As far as I know, cookware can last much longer if there is padding between every nested item and not just around the box.
It only takes a couple of seconds per each nested item, but it definitely pays off when you get your box at your new place.
- Step 4: Wrap Lids Separately
Cover each glass and metal lid separately in packing paper or bubble wrap, and place them standing vertically alongside the box rather than lying flat on top of the cookware inside the box. Packing lids vertically saves more space and puts less strain on any one lid.
Another common packing error is placing lids loose in the box without packing, resulting in chipped glass or metal lid surfaces. It takes no more than a minute to wrap a lid properly, saving from having your lid broken during moving.
- Step 5: Fill Gaps and Pack Snugly
Fill up all empty spaces in the box with packing paper or a rolled towel so nothing can move around during the transportation. An empty space in the box will allow cookware to move around and bump the walls of the box, which is the most common reason for dents.
Pack the box tightly enough, but be careful not to slam its lid down in an attempt to squeeze everything in; the latter indicates the box being overpacked. If it is hard for you to close the lid of the box, distribute some items in another box.
- Step 6: Keep Boxes to a Manageable Weight
Use small boxes for cast iron cookware, and use medium and large boxes for light aluminum and non-stick cookware. According to the recommendation from the Consumer Product Safety Commission, moving boxes should be safe to carry, at the weight that won’t strain the back muscles, and cookware is the easiest thing to overpack.
Also, if the box is overloaded, it will have higher chances to be dropped, thus damaging your cookware much more than anything else on the move. If a box feels hard to lift with both hands, then it’s too heavy to lift safely.
- Step 7: Seal and Label Clearly
Close the bottom and top flaps of the box and tape them securely with packaging tape. Use the permanent marker to write down the label, name the content and its approximate weight if it’s heavy. A label such as “Cookware, Heavy, Kitchen” will help whoever is going to handle the box to understand what he is going to pick up.
Experience shows that clearly marked boxes save lots of time.
How to Pack Different Types of Cookware
How to Pack Non-Stick Pans
The pans which require the utmost care when it comes to scratching are the non-stick ones. They are the most fragile parts of a cookware set. Wrap each piece separately and never nest something without a padding layer between the pan and what you are nesting with.
How to Pack Stainless Steel Pots and Pans
The stainless steel material is not as sensitive to scratches as the non-stick one, however, if dropped, it can dent as well. Pack and wrap all pieces in the same manner as others, but do not forget about the polished parts that will get scratched.
How to Pack Cast Iron Cookware
Cast iron is very solid material; however, it may chip if dropped or packed without a cushioning. Also, this type of cookware may rust if packed when it is not dry. To avoid it, make sure your pan is completely dry and lightly oiled, as instructed by most manufacturers. Pack it into a separate heavy-duty box, since it is quite heavy.
How to Pack Copper Cookware
The copper cookware is easily scratched and dented. It is possible to tarnish faster if packed along with other types of metal or kept in a damp box. Wrap each item in packing paper individually, do not nest copper directly against stainless steel or cast iron.
How to Pack Glass Lids
Glass lids have to be individually packed in bubble wrap or packing paper. This is due to the fact that glass is the most fragile component of almost all cookware sets. Glass lids have to be packed upright along one of the walls of the box, instead of being packed flat. Moreover, no other cookware has to be placed directly on top of the glass lid.
How to Pack Large Stock Pots
Stock pots occupy quite a large volume, thus, it will be difficult to pack them compactly. They should be packed as a base in a strong box, while using free space inside the box to pack other items like small lids or kitchen utensils.
Should You Nest Pots and Pans Together?
Nesting is a good packing technique as long as you are using padding between all components. Otherwise, nesting may cause some problems.
- The situation when nesting is safe: Nesting is okay for cookware made of the same material, which is also of a similar size. As a padding between items, you should use packing paper or a towel.
- Protection of non-stick coating: You shouldn’t nest a non-stick pan against another pan without using any padding.
- When cookware needs to be packed separately: Cookware made from cast iron, copper, or any other valuables or antiques can benefit from being separated from the rest of the cookware and packed in a separate box due to the likelihood of breaking and scratching.
- How to use packing paper or towels between nested items: Just one sheet of packing paper or a folded kitchen towel between each nested item would do. The point is not to allow metal-to-metal or coating-to-metal contact.
Common Mistakes to Avoid
- Cookware packing while damp
- Use of oversized boxes making carrying heavy cookware difficult
- Overpacking boxes to the point where they become too heavy to move
- Loosely packing lids without wrapping
- Nesting non-stick pans without anything between them Packing fragile kitchen items with heavy cookware in the same box
- Packing boxes with empty space inside allowing moving around
These are some of the mistakes that I see all the time after packing hundreds of kitchens. All of them are completely avoidable and take no additional effort when packing.
Professional Packing Tips
Keep cookware near the bottom of your list during kitchen packing, since you will most probably require at least one pot or pan to prepare your food during the last days before you move. Make sure to put away at least one basic pan, one pot and some utensils in an essential box so that you do not have to open the boxes while preparing your meal on the first night in your new home.
In addition to labeling your boxes according to what you packed inside, it would be great to label boxes by weight as well. It is easier to lift a box that says “Heavy” on its side. A written note with all cookware packed in this or that box will also make the process of unpacking much easier.
When Professional Movers Can Help?
It may seem that packing pots and pans on your own is easy enough for any family. Nevertheless, there are some cases when hiring professionals will be reasonable.
Firms such as Power Movers provide specialty and labor-only moving for those who have a large collection of kitchen items that may cause more harm due to the stress of moving.
For those who are moving a bigger or more expensive kitchen collection, there are services such as Power Movers, which provide specialty and labor-only movers, to ensure less physical labor and avoid risks of breaking the things while moving in rush.
In case you find yourself in a situation where you have a lot of work and little time, or some of the items in the kitchen need to be protected from damage, it is quite understandable to seek assistance.
Conclusion
The whole process of packing the cookware can be summarized in four basic steps: sorting, wrapping and padding the items, putting them into the box without making it too heavy, and labeling all of it properly. This step should be done slowly rather than fast, to make sure all of the cookware reaches the new house safe from any damage.
Are you going to pack all of your kitchenware by yourself or will you move it along with your whole house?

Article written by
Gary founded Power Movers in 2007 after watching too many moving companies damage or steal from customers with no consequences. The company runs on one rule: every crew member gets background-checked, trained, and held to the same standard Gary was held to as a police officer. Over 9 years in, Power Movers handles local and long-distance moves, specialty items, and corporate relocations for Houston businesses including Tesla and Airgas.