

How Do You Pack Pots and Pans for Moving Safely?
I’ll never forget packing a kitchen for a client moving from Houston to Dallas. She handed me a set of All-Clad cookware worth more than $2,000, a wedding gift from twenty years earlier, and asked if she should just leave it behind rather than risk breaking it. I walked her through the same wrapping method we use for glassware and let her watch every piece get wrapped, boxed, and labeled that afternoon. When she opened the boxes three days later, every pot and pan was untouched.
If you’re wondering how do you pack pots and pans for moving without ending up with dents, scratches, or non-stick coating that flakes off, you’re asking the right question. Damaged cookware is expensive to replace and completely avoidable with the right method.
In this guide, I’ll share the exact steps I’ve used to pack cookware for thousands of moves. By the end, you’ll know how to protect everything from everyday non-stick pans to cast iron Dutch ovens, whether you’re moving across town or across the country. Let’s start with the tools and materials you’ll need.
Why Proper Pot and Pan Packing Matters?
Cookware takes a beating in a poorly packed box. Pots knock against each other, lids scratch non-stick coatings, and cast iron chips enamel finishes when it isn’t cushioned properly. None of that damage happens because packing cookware is hard. It happens because it’s rushed.
A single stainless steel pot can cost $100 to $300. A dented pot isn’t just less attractive to look at; a warped base heats unevenly for as long as you own it. Non-stick pans are worse. Once the coating scratches, the pan is usually done for good, even if it still looks fine from the outside.
The good news is that packing cookware safely doesn’t require professional training. It requires the right materials and a method that accounts for weight, shape, and material. Anyone can learn this in an afternoon, and most of what follows applies whether you own three pots or thirty.
Tools and Materials You'll Need
Packing cookware safely doesn’t require specialty equipment or a moving company’s supply closet. Most of what you need is already in your house, or available at a hardware store or grocery store for a few dollars each. The goal with every item on this list is the same: keep metal from touching metal, and cushion anything glass so it can’t crack under pressure.
- Packing paper or kraft paper - Wraps individual pots and pans to prevent scratching and dings. $8-$15 per roll at hardware or moving supply stores.
- Bubble wrap - Adds a cushioning layer for high-value or non-stick cookware. $10-$18 per roll.
- Packing tape and a dispenser - Secures wrapped items and seals boxes. $3-$6 per roll.
- Bath towels or old rags - Cushions pots inside the box and fills gaps between layers. Free if you use what's already in the closet.
- Newspaper or blank newsprint - Fills empty space in boxes so cookware can't shift during transport. Free if you've saved some, or $8-$10 for a bundle.
- Medium moving boxes - Holds packed cookware without becoming too heavy to lift safely. $1-$2 per box, or free from grocery stores.
- Foam pouches or foam sheets - Protects non-stick coatings and glass lids from scratching against other items. $6-$12 for a pack.
- Furniture pads or moving blankets - Adds extra cushioning for cast iron or oversized stock pots. $15-$25 to buy, or rent from a moving supply store.
- Permanent markers - Labels boxes with contents and fragility warnings. $2-$4.
- Box cutter - Opens sealed boxes at your new kitchen without damaging what's inside. $5-$8.
- Kitchen scale (optional) - Confirms a packed box hasn't crept past the 40-50 pound range that makes boxes unsafe to carry. $10-$15 if you don't already own one.
Most of these items cost under $50 total, and you probably have several at home already. This small investment protects cookware that might otherwise be ruined by improper packing.
Preparation Steps Before Packing Pots and Pans
Good packing starts before you wrap a single pot. A few minutes of prep now prevents rust, mildew, and scratches you can’t explain later. Skipping this step is one of the biggest reasons DIY cookware packing goes wrong, and it’s also the easiest thing to fix. Set aside 20 to 30 minutes before you touch any packing paper.
- Clean all pots and pans thoroughly - Food residue attracts pests and can bake onto the surface during a long move in a hot truck.
- Dry everything completely - Leftover moisture gets trapped during transit and leads to rust on cast iron or mildew on wrapping paper.
- Remove lids and set them aside - Lids left loose inside their pots are one of the most common causes of chips and scratches.
- Inspect for existing cracks or chips - Note any damage before the move so you're not blaming the move for something that was already there.
- Sort by material - Stainless steel, non-stick, cast iron, and glass each need different handling, so group them before you start wrapping.
- Group similar sizes together - Packing similarly sized pots in the same box keeps weight distribution even and boxes easier to seal.
- Clear a large, flat work surface - You need room to lay out paper, wrap items, and stage boxes without knocking anything over.
- Gather all materials first - Stopping mid-pack to hunt down more tape or paper is when items get left unwrapped or rushed.
This prep stage is where most DIY movers lose time, not because it’s difficult, but because it’s tempting to skip straight to wrapping. Professional packers build this step into every job automatically. It’s part of why an experienced crew can pack a kitchen in under two hours while a first-timer might spend an entire afternoon on the same number of boxes. Sorting and cleaning first is the single biggest factor in whether your cookware arrives the way it left.
Step-by-Step Methods for Packing Pots and Pans
Not all cookware packs the same way. A lightweight non-stick skillet needs less protection than a five-quart cast iron Dutch oven, and a set of $40 aluminum pans doesn’t need the same treatment as a $500 All-Clad set. Below are three packing methods, plus a dedicated approach for oversized pots. Pick the method that matches what’s actually in your cabinets, since most kitchens end up using two or three of these approaches across a single move.
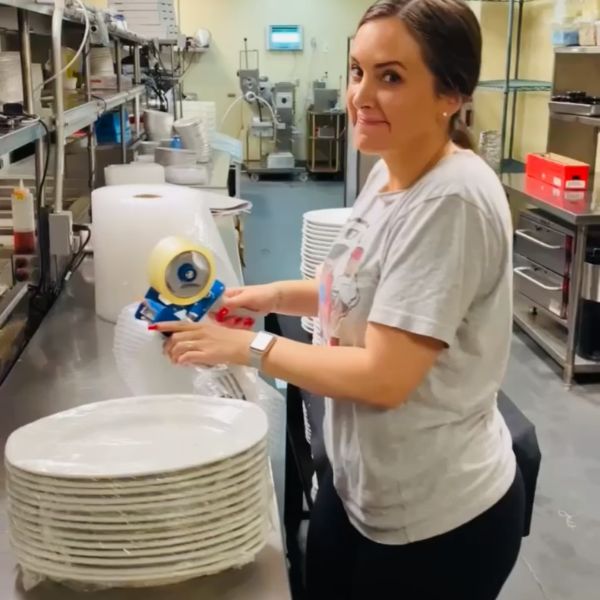

Method 1 - The Paper Wrap Method (Best for Standard Pots and Pans)
This is the method to reach for with everyday stainless steel, aluminum, and lightweight non-stick cookware, the pieces most kitchens have the most of.
- Lay two to three sheets of packing paper flat on your work surface for a medium-sized pot.
- Set the pot or pan face-down in the center of the paper so the cooking surface is shielded from the paper's ink.
- Wrap the paper around the cookware at least two complete times, covering the handle and any exposed edges.
- Fold the loose ends underneath the pot and secure them with tape, rather than wrapping tape directly around the paper where it can tear.
- Line the bottom of a medium box with a folded towel to protect it from road shock.
- Stack heavier, wrapped pots in the bottom and place smaller wrapped items on top, inserting a towel between each layer of cookware.
- Pack remaining space with crumpled paper until the box’s contents don’t shift when rocked gently.
I’ve found paper is thin enough to hug every corner of a pot, yet tough enough to stop metal scratching metal. It’s the cheapest material on the planet, too. This paper wrap has carried just about everything in an average kitchen, no upgrades needed, when I’ve packed kitchen items for clients on the move.
One full kitchen move from Houston to Dallas only required paper-with the exception of one cast-iron skillet-and nothing sustained so much as a scuff. If a pot weighs more than 10 pounds or costs more than $150, consider adding a second layer of protection with Method 2 below.
Method 2 - The Bubble Wrap and Towel Method (Best for High-Value Cookware)
The last thing you want when packing an All-Clad set or a Le Creuset Dutch oven is to have the coating scratch or the glass lid break.
- Wrap each piece in one layer of paper, so bubble wrap doesn’t directly touch the cookware.
- Layer the paper-wrapped item in bubble wrap, bubble side inward, for any pot or pan valued below $200; for items worth $200 or more, wrap each piece in two layers of bubble wrap to guard against potential truck-ramp tumbles.
- Always wrap lids separately from pots, even within a matching set, as even curved glass or metal pressed against glass or metal can easily chip or shatter.
- Secure each bubble-wrapped item with plenty of tape so the padding won’t slide off during transit.
- Stuff a folded towel along the bottom and up the sides of the box before loading anything into it, and place only one or two heavy pieces in each box because even single pots and pans can become weighty, and a heavier box is more likely to take a tumble.
- “Fragile: High-Value Cookware” must be boldly stenciled on at least two sides of the box.
When one of my clients shipped a $500 Le Creuset for less than a hundred dollars and it arrived dented, I switched to recommending two layers of bubble wrap for anything over $200, with no exceptions. For long-distance moves with large collections of valuable cookery, professional moving companies such as Power Movers are experienced with custom packing solutions for delicate, heavy, high-value items.
How to Pack Big Pots and Pans for Moving (Special Considerations)
Oversized cookware such as canning pots, paella pans, and roasting pans pose particular challenges due to their large size and weight.
- Layer each pot in at least three sheets of packing paper. They require the most room of all kitchen items to spread out. For large items with lots of surface area that are prone to sliding and scratch, layer with as much paper as possible; 3 layers minimum.
- Use only heavy-duty boxes, at least a 65 lb. Rating, not ones taped from old uses.
- Line a box bottom with one large folded towel, a folded quilt, or moving pad; lay the biggest pot in center, and pack towels firmly on all sides so it is immobile.
- Never stack large pans together. If you must, put a layer of thick folded towels between each.
- The packing space that isn’t filled with pans should be packed tightly with crumpled paper or peanuts.
- One large stockpot alone can weigh between 5–8 pounds.
Pack too much together and you’re looking at a 30–pound box of cookware before adding any packaging. When possible, use smaller boxes containing fewer large pots.
Method 3 - The Lid-Separate Packing Method (Best for Cast Iron and Specialty Cookware)
Weight and potential for rust require different packing techniques for specialty cookware like cast iron or griddles.
- Apply a thin layer of cooking oil to all cast iron items before wrapping to help them from rusting.
- Then wrap in packing paper and bubble wrap if the piece has an enamel coating (e.g., a Dutch oven) or delicate glass elements.
- Always separate the lids from their corresponding pans. This way, when the pot and lid stack, there is no risk of cracking an enamel finish due to added weight or pressure.
- Use a smaller (small-medium sized) box for cast iron to avoid creating a dangerously heavy box (up to 50+ lbs) filled with cookware.
- Group all your specialty items (griddles, woks, cast iron) together in dedicated boxes and label them.
For those who don’t have the time or feel unsure, professional movers such as Power Movers specialize in packing these delicate, heavy items with tailored solutions.
Special Considerations for Different Cookware Types
Moving kitchen items safely comes down to treating each material differently, so it helps to think about your cookware by type rather than packing everything the same way.
- Non-stick cookware: Requires careful wrapping to prevent coating damage. Use an extra sheet of paper between each pan.
- Stainless steel cookware: Durable but prone to scratching. Packing paper protects the finish from other metal.
- Cast iron skillets and Dutch ovens: Heavy and prone to rust. Needs moisture protection and thick cushioning.
- Copper-bottomed cookware: Tarnishes quickly. Keep it away from moisture and away from direct contact with other metals.
- Hard-anodized aluminum: Lightweight but scratches easily. Needs paper wrapping and padding, just like stainless steel.
- Specialty items (woks, griddles, paella pans): Oversized shapes often need their own box or a custom approach.
- Glass lids: Extremely fragile. Wrap separately with bubble wrap and pack in a dedicated fragile box.
In over 10 years in the moving industry, I have encountered many reasons why someone might be paying me $7 per pan to pack, and the variety of cookware materials and how fragile each one is a primary reason why people break items-and then have to call me again, after the fact, because a $300 stainless-steel set or $75 cast iron has a chip out of it.
Common Mistakes to Avoid When Packing Cookware
Over the course of many thousands of kitchen packs, I’ve observed these few common mistakes repeated time and time again:
- Packing Dirty or Wet Cookware: Moisture or stuck-on food inside cookware promotes rust, mold and stubborn odor.
- Stacking Without Cushioning: Metal rubbing against metal during transit can lead to chips and dents.
- Too Much Cost-Cutting with Wrapping: A single sheet of packing paper won't protect a heavy pot from denting the one below it.
- Mixing Heavy Pots and Fragile Glass: The weight of your cookware can crush delicate glass lids and dishes.
- Packing Lids Inside Pots: When both are hard, the inside rim of the pot can chip and damage the coating on the lid.
- Overloading Boxes: Heavy boxes are more likely to be dropped or the bottom will burst.
- Unlabeled Boxes: Without clear labels, boxes can be stacked carelessly and mishandled.
- Leaving Empty Space in Boxes: Cookware that shifts during transit is bound to get dented.
These aren’t deal-breakers, they’re learning experiences. They are also precisely why professional movers exist. If you’re concerned about damaging your favorite kitchen investment through these common blunders, Power Movers offers specialty packing services utilizing industry-best materials and years of expertise.
When to Hire Professional Packers for Kitchen Items?
Packing up a kitchen by yourself isn’t always feasible or efficient. Don’t view this as a sign of inadequacy, but rather a realistic assessment of time and resources.


- Your kitchen features 50 or more cookware items that would take days to hand-wrap individually.
- You possess antique or highly valuable cookware you can't replace if anything were to happen.
- You're on a tight moving schedule and can't dedicate days to careful wrapping.
- You don't have adequate packing materials or space to do the job right.
- You have physical limitations preventing you from lifting and wrapping heavy pots, cast iron, or cookware properly.
- Your move is long-distance, with more travel time increasing the chances of damage.
- You're moving with specialty cookware that mixes easily with everyday items, making it prone to mishandling without a structured approach.
Professional packing provides materials, expertise, and insurance coverage, protecting your irreplaceable kitchen items. There’s no universally correct approach; the decision rests on which strategy aligns with your specific needs and valuable possessions.
Unpacking and Organizing After Your Move
Your responsibility doesn’t end when the last box is taped. The unpacking process is critical for early damage detection and restoring kitchen functionality quickly.
- Unpack your cookware in the new kitchen immediately after arrival, rather than letting boxes accumulate.
- Carefully unwrap each pot and pan, inspecting it thoroughly for any dents, cracks, or scratches before setting it aside.
- Wash all cookware in warm, soapy water to remove dust and residual packing materials.
- Allow everything to air dry completely before storing, particularly cast iron, to prevent rust.
- Return your cookware to its place in the new kitchen before dismantling and discarding packing materials.
This immediate inspection is more important than most people realize. It helps distinguish moving-related damage from damage incurred after the move, strengthening any potential insurance claim.
Final Thoughts
Packing pots and pans effectively isn’t inherently complex but requires foresight and the right approach for each item in your cabinets. Whether it’s simple packing paper for non-stick pans or multi-layer bubble wrap for a Dutch oven, technique matters more than speed.
Be prepared for the process to take longer than you anticipate, especially for a full kitchen or restaurant. Allow an afternoon, not an hour. If you reach a point where you lack the time, materials, or physical ability to complete the job professionally, recognizing this and seeking help is a practical decision, not a failure.
Knowing how to pack pots and pans properly ensures they arrive ready for use, regardless of whether your move is across town or across the country.
Considering the methods outlined above, what approach to packing your cookware feels most practical for your upcoming kitchen relocation?