
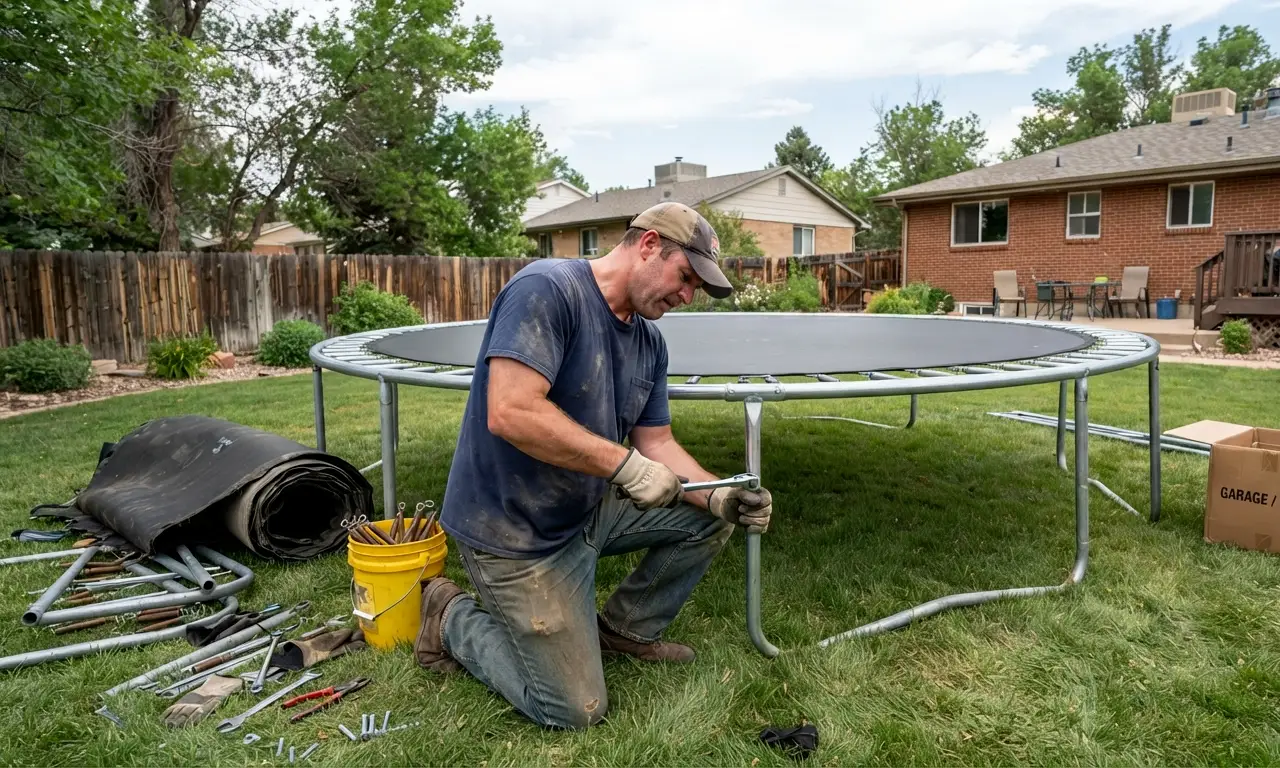
How to Move a Trampoline: A Step-by-Step DIY Guide
A few years back I showed up to a job and found a family standing around their trampoline, tape measure and pliers in hand, looking completely defeated. They’d tried to drag the whole thing assembled across the yard to the gate. It didn’t fit. One leg was scraped up, the frame was bent, and they were about to just leave it for the new owners.
That image has stuck with me because it happens constantly. To move a trampoline you have to take the trampoline apart piece by piece, label every bolt and pole as you go, move the frame and mat separately, and put it back together at the new place. Try to move it in one piece and you’re looking at damage, sometimes an injury.
If you’ve got the patience for it, this is a doable weekend project. Here’s how to actually do it right.
Table Of Contents[hide]
Tools you'll need
Nothing special, most of this is already in your garage, and the rest is a quick hardware store run. Here are the list:
- Ratchet straps
- Moving blankets
- Work gloves
- Adjustable wrench
- Socket wrench
- Zip ties
- Rope
- Dolly
- Furniture sliders
- Tape measure
- Plastic bags for bolts
- Permanent marker
The socket wrench and a stack of small plastic bags save more headaches than everything else combined. Trampolines have dozens of tiny bolts, and losing track of them is the number one reason reassembly turns into a two-hour mess.
Things to Check Before Moving a Trampoline
- Give yourself ten minutes to check a few things first. This is the step everyone skips, and it's usually the reason a move goes sideways.
- Check the wind. Trampolines catch air like sails a half-disassembled frame or an enclosure net can start moving on its own in a light breeze. Pick a calm day if the weather cooperates.
- Check the weight. A standard 14-foot frame runs 100 to 150 pounds once you count the poles and springs. Don't find that out halfway through a solo lift.
- Trace the route from the trampoline to your truck or trailer and look for tree roots, sprinkler heads, uneven ground anything that could trip you while you're carrying an awkward piece of steel.
- Measure the gate. This is the exact mistake from my story above, and I still see it constantly. Measure your gate opening against your longest disassembled piece before you start.
- Check your vehicle. A full frame, even broken down, usually needs a truck bed or trailer. A sedan trunk isn't going to happen for most residential trampolines.
- If anything's going to stick out past your tailgate, look up your local rules on flagging oversized loads most places want a red flag on anything hanging more than four feet past the bumper.
Step-by-Step Guide to Moving a Trampoline
- Step 1: Remove the Safety Net and Enclosure Poles
These come off easiest, and clearing them first gives you room to work. Unclip the net, then pull each pole from its sleeve twist it loose rather than yanking, since yanking can bend the sleeve connectors. If a pole’s stuck, a shot of lubricant at the base beats forcing it.
- Step 2: Remove the Trampoline Mat
Most mats attach with springs; some smaller trampolines use elastic instead. A spring tool helps here, or pliers wrapped in a rag if you don’t have one. This is where most injuries happen springs are under real tension and can snap back hard.
Pull at an angle, keep your face clear, and wear gloves the whole time. If a spring’s rusted stuck, leave it and come back to it after the easy ones are done.
- Step 3: Organize and Label the Springs
Drop them in a plastic bag, mark it with the permanent marker. Same for any loose bolts. I’ve watched people burn an entire hour on the other end of a move hunting for one missing spring buried in a stack of boxes. Labeling takes thirty seconds.
- Step 4: Disassemble the Frame
The curved steel tubes connect at T-joints or W-joints. Loosen any bolted connections with the wrench and separate the tubes. Before you fully take it apart, lay each section flat and snap a photo you’ll want that reference once every tube starts looking identical.
- Step 5: Wrap and Pad the Frame Sections
Wrap each section in a moving blanket, secure with zip ties or rope. People skip this because the frame’s “just going in the yard anyway,” but unpadded steel clanging around in a truck bed will scratch paint and dent a tailgate faster than you’d expect.
- Step 6: Move the Sections to Your Vehicle
This is where the dolly and sliders pay off slide furniture sliders under the heavier legs before lifting, roll longer pieces on the dolly instead of carrying them. Lift with your knees, and don’t try to carry anything over 40 pounds alone. Back injuries from hauling awkward steel tubing are some of the most common injuries I’ve seen in this line of work.
- Step 7: Load and Secure Everything
Lay the padded sections flat in the bed or trailer, cross your ratchet straps if you’ve got multiple pieces so nothing slides. Tie a flag or bright cloth to anything sticking past the tailgate. Check your straps again after the first five minutes of driving loads settle once you’re moving.
- Step 8: Reassemble at the New Location
Reverse the process. Use your labeled bags and reference photos to rebuild the frame first, then the mat and springs, then the poles and netting. Make sure the frame sits level before you reattach the mat an uneven frame puts uneven tension on the springs and shortens the mat’s life.
Special Situations
How to Move a Trampoline by Yourself
That’s feasible but I won’t lie and say it’s easy. Disassembling and assembling are activities that can be done alone as most of the time will be spent using a wrench and nuts. The only parts that are dangerous to handle alone are the full length of frame pieces which have to be lifted into the truck bed.
In case you are handling this job alone, take apart the frame into smaller sections compared to what is done when the job is being done by two people.
How to Move a Trampoline Without Wheels
Most trampolines do not have wheels, which is just fine. You may use furniture sliders as an alternative to moving legs of the frame across grass or concrete without having to lift the entire trampoline.
If you need to move longer distance around your yard, then you can use a garden cart or wheelbarrow for a disassembled part of the frame as long as you properly pad it. However, be sure not to drag the metal frame on concrete/pavers since it will scratch both surfaces.
How to Move a Trampoline Without Taking It Apart
This question is often asked, and I can tell you straight away that it is generally not recommended. It is big and awkward, and many houses are not designed for this kind of thing.
The only exception is if you have a very short move. If you need to move your trampoline from one place in the yard to another in the same yard, you will still need at least three or four people to do this safely.
These shortcuts work fine for everyday flatware, especially on a short move. Formal silver, plated pieces, and antiques are the exception wrap those individually. Metal-on-metal contact is what leaves visible scratches, and those pieces don’t hide damage well.
Common Mistakes to Avoid
- Failing to label and mistakenly combining bolts and springs
- Trying to move the constructed trampoline through a narrow gate
- Lifting the frame pieces alone by oneself
- Failing to check weather conditions before moving
- Neglecting to protect the frame while loading it onto the truck
- Failing to check regulations for oversized load flagging
- Assembling it in an area not level
This is the same advice that I’ve learned from years of helping families with their moves. None of these mistakes actually costs anything to avoid – they simply require a little preparation before you begin.
When to Hire Professional Movers
While DIY trampoline relocation is usually an efficient solution for the majority of backyard trampolines, there are certain situations where calling for some help would be better than going on your own.
First of all, if your trampoline is oversized, if your yard has a hard-to-navigate path or a tricky gate, or if you have to move it any significant distance within your city, you will need help of professionals who will make sure that the item will reach its destination in one piece without damaging your property and your body.
Professional companies such as Power Movers specialize in handling of difficult objects and, therefore, disassembly and assembly process will be performed much quicker and without any problems. The age and physical strength also play an important role – inability to lift 100-plus pounds of metal should not be considered a shame, but a serious reason to hire someone.
Conclusion
Trampoline relocation is just about being patient and organized; dismantling, labeling and packing your trampoline according to the instructions listed above will prevent you from such problems as scratches on the paint job, bent frames, or even a backache.
If you ever come across a situation when the task is too big for you or the time that you have, Power Mover’s Specialty Moving and other specialists are always available to help you out. Whether you do it yourself or ask some people to help you, the main idea remains the same, to relocate your trampoline safely. Are you ready to start relocating now?

Article written by
Gary founded Power Movers in 2007 after watching too many moving companies damage or steal from customers with no consequences. The company runs on one rule: every crew member gets background-checked, trained, and held to the same standard Gary was held to as a police officer. Over 9 years in, Power Movers handles local and long-distance moves, specialty items, and corporate relocations for Houston businesses including Tesla and Airgas.